- Has 2 charges.
- Holding Tactical button delays the launch. Melee cancels the launch.
- Can be used simultaneously with other actions (firing, reloading, healing, etc.) without interrupting them.
- Once deployed, the device explodes on contact and leaves a lingering cloud for 10 seconds.
- Getting hit either directly or by walking into the cloud deals 10 damage and disables tactical, ultimate, and some specific passive abilities for 15 seconds. (Click here to see the list of affected passives.)
- Enemies hit will also be slowed if Fear Paralysis perk is equipped.
- This only prevents enemies from activating the abilities. Abilities already in use are not affected, excluding abilities such as Gibraltar's
 Gun Shield, Lifeline's
  Combat Revive and Pathfinder's
  Grappling Hook.
Revenant/Mobile
< Revenant(Redirected from Revenant (Mobile))
Jump to navigation
Jump to search
| Apex Legends Mobile game content
This article concerns the subject and the content related to it in Apex Legends Mobile. For the subject in Apex Legends, see Revenant. For the background of the subject in Apex Legends universe, see Revenant (character). |
| “ | Don't bother trying to find me. I'll find you. |
| Revenant |
|---|

|
| Synthetic Nightmare | |
| Details | |
| Real Name | Kaleb Cross |
|---|---|
| Gender | Male |
| Age | 44 (as a human) 315 (as a simulacrum) 359 (total) |
| Homeworld | Unknown |
| Gameplay | |
| Legend Type | |
| Tactical Ability | |
| Passive Ability | |
| Ultimate Ability | |
| Real-world Info | |
| Voice Actor | Darin De Paul |
Revenant is a ![]() Offensive Legend introduced in Season 3.5 of Apex Legends Mobile that is locked from the base game. He can be purchased using
Offensive Legend introduced in Season 3.5 of Apex Legends Mobile that is locked from the base game. He can be purchased using ![]() 750 or 10 Revenant Fragments.
750 or 10 Revenant Fragments.
Abilities
Silence

|
Tactical | Q/ |
|---|---|---|
| Silence | ||
| Description | Throw a device that deals damage and disables enemy abilities for 15 seconds. | |
| Cooldown | 25 seconds | |
- When it explodes against a door, the cloud moves with the face of the door when people open it.
- Silencing a Wraith while she's placing her
 Dimensional Rift will cancel the ult. Wraith will be able to use it again once the silence runs out.
 - The device can be shot down by Wattson's
 Interception Pylon.
 - Triggers Caustic's
 Nox Gas Traps.
- Do not expect the ability to fully kill an enemy unless their health is extremely low.
- You can throw this device and a
 Frag Grenade at the same time. Use this to ambush an enemy and gain a huge upper hand.
 - You can use this as an area of denial to block a path for 10 seconds such as a doorway, stairs, etc. This can potentially buy you some time to pop a heal or revive a knockdown teammate.
- If you're going through Wraith's Dimensional Rift portal and know you're about to be pushed, throw Silence on it to catch the enemies off guard and instantly damage and disable their abilities that chase you through it.
- If you look directly up and shoot your Silence in the air, it'll come down 4 seconds later landing directly on you. Combine this technique with a Frag Grenade for a devastating surprise.
- The Silence causes a lot of visual clutter. You can use this as cover for when you revive a teammate.
- In rare cases, the player who is silenced may not see the orange effect that takes up the edge of the screen while they are silenced.
Stalker

|
Passive | |
|---|---|---|
| Stalker | ||
| Description | You crouch walk faster and can climb walls higher. | |
- Revenant's crouch-walking speed is the same as his walking speed.
- Revenant's crouch-walking speed is the same as his sprinting speed if Death Stalker perk is equipped.
- Revenant can climb walls more than 6 times as high (26.5 meters, or 8 stories tall) as a normal Legend. He can also climb shorter walls 25% faster because it takes longer for his climbing speed to decelerate.
- Use this to outflank enemy squads or ambush squads in high buildings, if your team is attacking in one direction try to use this to attack from the side.
- Crouch ADS strafing is faster than normal strafing and makes your hitbox smaller.
- Legends make no noise while crouched. Use this and your extra speed to confuse enemies and shake them off your tail.
- With many weapons, crouching can increase accuracy. Use this to have increased accuracy at the same time as strafe speed.
Death Totem

|
Ultimate | Z/ |
|---|---|---|
| Death Totem | ||
| Description | Drop a totem that protects users from death. Instead of getting killed or downed, you will return to the totem. | |
| Charge time | 3 minutes | |
- The totem takes 1 second to create, lasts 30 seconds, and has 100 Health.
- When placed, the totem emits a visual effect that can be seen by enemies.
- Both squadmates and enemies can use the totem one time each to turn themselves into a shadow for 25 seconds.
- Allies will get Stalker passive if No Rest For The Wicked perk is equipped.
- The Death Totem's default 30-second timer is extended by whoever is the last person to become a shadow. When that person's shadow form ends, so will the totem.
- Shadows can't use healing items, and all received damage ignores their
 Body Shields or
  Evo Shields.
 - When a shadow is killed, they return to the totem with 50 Health (or whatever health they had when they activated it, if lower) and other players see a short whispy red trail providing an approximate clue where the totem is placed.
- The totem can be damaged by Revenant but not by his squadmates.
- The totem can block doors.
- Players cannot use Wraith’s Dimensional Rift for two seconds after returning to the totem.
- Players cannot receive shields from Wattson's Interception Pylon as a shadow.
- Octane's passive,
 Swift Mend can still restore his health even during shadow form.
 - Death protection will immediately wear off as soon as you enter the boxing ring at Pathfinder's Fight Night. This will not come back upon exiting the ring.
- Performing a Finisher while in shadow form refills your Body Shield at the end even though you cannot normally heal in this form.
- Recharge your shields before activating the totem on yourself.
- Make sure you have Health before using the death totem. Any damage you take in shadow form mode is based on your health bar and not your shield bar.
- If you're killed in shadow form, the first thing you should do is pop a
 Med Kit or
  Phoenix Kit if you forgot to heal beforehand.
 - In shadow form, you'll want to be as aggressive as you possibly can be because you have nothing to lose. Try to get as much damage in as you can in the 25 seconds you have on the timer. Thirst knockdown enemies as fast as possible since you won't be punished for it if you're killed.
- Avoid placing the totem in the open, as it can be easily destroyed.
- Be aware of enemy Caustics as their Nox Gas Trap bypasses shields if you're caught returning to the totem. Try to look around for any enemy Caustic before placing the totem.
- Sometimes you can enter shadow form and use the Death Totem as a small piece of cover if you're in the open.
- Enter shadow form mode if you want to take the risk of reviving a knocked down teammate or making risky Respawn Beacon plays.
- Place the totem on high ground places or platforms, so you can prepare to drop down and go crazy without worrying about any enemies getting to your totem's location.
- When you are low on time with the Death Totem and you need to go back for health or team support, try standing still and letting the enemies kill you, sending you back to the Death Totem.
- Combine this ability with Octane's
 Launch Pad to get to the fight quickly and return to the fight much quicker.
 - Combine this ability with Wraith’s Dimensional Rift to get into the fight quickly and without being sent back to the Totem when entering the fight.
- Be wary of using this ability against a Crypto, as his
 Drone EMP can destroy it instantly.
- In rare cases, if Revenant gets punched by an enemy while at low health in Death Protection, the enemy will teleport with Revenant back to the totem.
- While in Shadow form and executing a finisher, if the Death Protection is expired before completing the finisher, the player will get stuck and end up unable to perform any action besides opening the menu. Only getting attacked will release from the bug/unfinished finisher.
- Sometimes, when the totem is placed too near or touching objects and walls, it disappears, wasting the use of your ultimate ability. The ultimate UI also shows that the ultimate is in use when this glitch occurs.
Perks
Perks
- Death Stalker: Crouch walk speed increases.
- Nightmare Fuel: Climbing reloads your weapons.
- Creeping Dead: Allows Revenant to climb with horizontal control.
Finisher Perks
- Battle Adaptation: Using your finisher adds 100 points to your Evo Shield.
- Deadly Momentum: Using your finisher reduces your ultimate cooldown by 30%.
- Interrogator: Using your finisher reveals the location of your target's squad on the mini map.
Ability Perks
- No Rest For The Wicked:
 Death Totem grants
  Stalker to allies.
 - Fear Paralysis: Enemies hit by
 Silence will also be slowed.
 - Zombie Siphon: While under the effect of Death Totem, knocking enemies restores HP.
Lore
Main article: Revenant (character)
| “ | Revenant used to be human. He used to be the greatest hitman the Mercenary Syndicate ever had. He used to look in the mirror and see his human face looking back. But time changes everything, and when his programming finally failed, he saw what he had become at the hands of the Mercenary Syndicate and Hammond Robotics: a walking nightmare of steel and vestigial flesh. His masters resurrected him as a simulacrum, snatching him from death’s embrace again and again and programming him to forget.
He swore he would hunt down every last person who did this to him, but more than two centuries have passed, and they're all gone… or so he thought. The return of Hammond Robotics to the Outlands has renewed his thirst for vengeance, and he won’t stop until anybody connected to Hammond is dead. Of course, he doesn’t mind eviscerating a few of the Legends along the way. He used to need a reason to kill… but he’s not that man anymore. |
Cosmetic Items
Skins
There are a total of 11 Legend skins for Revenant - 2 Legendary, 5 Epic, 4 Rare, and 1 Common.
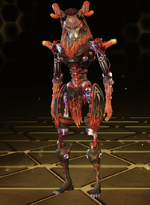
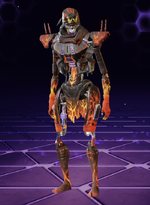
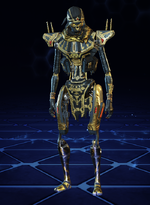
Mechanical Minotaur
 Moon's Dark Side
Level 30


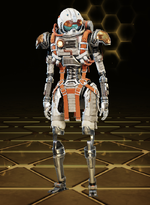
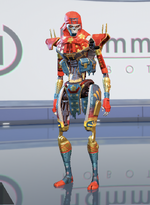
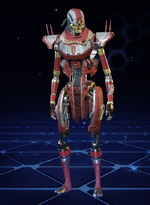
 Daemon's Destination
Level 50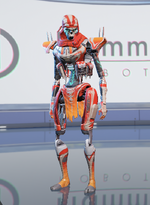
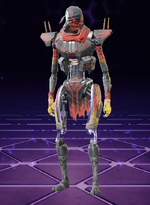
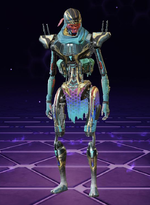
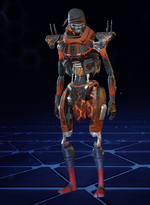
Spinal Tap
 1,499
1,499
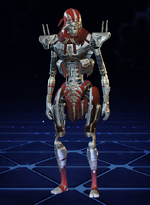
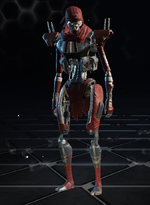
Dead End
Gate Keeper
 Vile Anomaly
 10,000


 Bone Collector
 5,000
5,000
Death Etching
Red Snow
Horned Monstrosity


Classic
Default

Finishers
Snap Decision
Default
Emotes
- Stay Sharp
Skydive Emotes
Revenant does not have any Skydive Emotes.
Emoji Pack
Season 3.5 Emoji
Another Victim

Violence
Disappointment


Banner Frames
- Infernal Sacrifice - 7,000
- Scorch of the Underworld
Holosprays
 Revenant's Return 3,000
Season 3.5 Holospray
 Don't Scream
Level 8


| ||||||||||||||