How to play guide for Apex Legends
Rampart says: "This page is lacking content, so stop foolin' around and finish it, mates!"
|
This page will serve as a basic "how to play" guide for Apex Legends and thus, will often utilize informal expressions such as "you". Check back often, as new information is being added all the time! Feel free to edit this guide with any tips, tricks, and suggestions.
Basic gameplay
Apex Legends is a hero shooter game where in the main "Play Apex" game mode, 20 squads of 3 members or 30 squads of 2 members choose playable character classes called Legends, and launch from a flying ship into one of the currently available arenas. Upon landing, they must search for weapons, gear, and other items to help them kill off the other teams while simultaneously staying inside a shrinking safe zone called The Ring. The last squad standing wins.
Each Legend has three abilities unique to them: a Passive ability that is always active, a Tactical ability that can be periodically activated and has a cooldown between uses, and an Ultimate ability that acts as a powerful, potentially game-changing tool which charges over time as well, although slower than a Tactical, but can be shortened by using ![]() Ultimate Accelerants. Some Legends also have Perks, which are bonus Passive abilities applied only to a certain group of Legends.
Ultimate Accelerants. Some Legends also have Perks, which are bonus Passive abilities applied only to a certain group of Legends.
Each Legend has 100 base health and, upon depleting all of it, they enter a Bleeding Out state where they are given 100 additional temporary health. While Bleeding Out, Legends can only crawl, ping, interact with doors, and use a ![]() Knockdown Shield to shield themselves or their teammates from incoming fire if they have one, at the cost of moving even more slowly. A teammate can approach a downed Legend and attempt to Revive them: if the Revive is successful, the downed Legend will be healed to 20 health, if the Revive is not successful, either by not being Revived in time or by depleting the 100 additional health given, the Bleeding Out Legend will die. A dead Legend however can be still brought back if a living squadmate has grabbed their Banner Card within 2 minutes from their death, otherwise their Banner Card will expire and a respawn will no longer be possible, and respawned at a
Knockdown Shield to shield themselves or their teammates from incoming fire if they have one, at the cost of moving even more slowly. A teammate can approach a downed Legend and attempt to Revive them: if the Revive is successful, the downed Legend will be healed to 20 health, if the Revive is not successful, either by not being Revived in time or by depleting the 100 additional health given, the Bleeding Out Legend will die. A dead Legend however can be still brought back if a living squadmate has grabbed their Banner Card within 2 minutes from their death, otherwise their Banner Card will expire and a respawn will no longer be possible, and respawned at a ![]() Respawn Beacon or
Respawn Beacon or ![]() Mobile Respawn Beacon. Once the Banner Card is grabbed, it cannot expire. Respawned Legends will have full health.
Mobile Respawn Beacon. Once the Banner Card is grabbed, it cannot expire. Respawned Legends will have full health.
Although Legends have 100 health, ![]() Evo Shields can be equipped to increase their health depending on the Shield's level. Evo Shields can also be upgraded by dealing damage to opponents.
Evo Shields can be equipped to increase their health depending on the Shield's level. Evo Shields can also be upgraded by dealing damage to opponents.
Before dropping into the arena, Legends are given an ![]() Evo Shield, 2
Evo Shield, 2 ![]() Shield Cells, and 2
Shield Cells, and 2 ![]() Syringes. These are also given to respawned Legends.
Syringes. These are also given to respawned Legends.
Looting etiquette
While generally the loot goes to whoever discover it first, there are some exceptions in order to maximize the team's potential. To check which items you and your teammates currently have, all you have to do is open your inventory.
Here's a list of items that have priorities among Legends:
- Level 4
 Knockdown Shield: if a Legend equipped with this item revives a Bleeding Out teammate, the revived Legend will receive 50 bonus health and shields, that stack with the base 20 health given after the revive. It is wise to give this item to, in order:
- Newcastle, due to
 Retrieve the Wounded allowing him to Revive teammates while shielding both of them at the same time, along with being able to move around while doing so;
 - Lifeline, Gibraltar, or Mirage (They are equal)
- Gibraltar, due to
 Dome of Protection allowing him to Revive in an (almost) unbreakable dome 33% faster than other Legends;
 - Mirage, due to
 Now You See Me... allowing him to turn almost fully invisible while Reviving, as well as 3 seconds cloak after revive;
 - Lifeline, due to
 Combat Medic allowing her to fight and revive 2 teammates at the same time; considered slightly lesser than Newcastle due to her revive exposes teammates to attacks;
- Gibraltar, due to
- Bangalore, due to
 Smoke Launcher creating a curtain of smoke which hides her while performing actions;
 - Caustic, due to
 Nox Gas Traps and
  Nox Gas Grenade creating a curtain of gas which hides him while performing actions.
- Newcastle, due to
- Level 4
 Helmet: although being a valuable item for basically every Legend due to shortening the cooldown of Tactical and Ultimate abilities by 15%, Octanes should NEVER pick up this item over other Legends, due to his Tactical and Ultimate recharge at, respectively, 1 second and 90 seconds. Everyone knows he's fast, he doesn't need to be faster when there's Legends such as Bangalore whose Ultimate cooldown can last up to 4 minutes.
 - Highest-level Knockdown Shield: while generally you want to avoid getting knocked and therefore Knockdown Shields not really mattering much, it is wise to give the best Knockdown Shield to Newcastle, due to his Retrieve the Wounded ability which makes use of the Knockdown Shield's shield amount while Reviving. As Newcastle say "Help him, help you"
 Ultimate Accelerant: Accelerants are items generally favored by all Legends, but the one Legend that makes the best use out of them is Wattson, due to her
  Spark of Genius ability that not only allows to stack 2 of them in the same inventory slot, but also fully charges her Ultimate instead of giving it a measly +35%.
- Light machine guns: Rampart should be encouraged, but not required, to pick up an LMG due to her
 Modded Loader ability that boosts reload speed and mag size of all LMGs.
 - Ordnance: Fuse should be very encouraged, but not required, to pick every single type of grenade he sees due to his
 Grenadier ability that allows him to stack 2 grenades of the same type in the same inventory slot, also allowing him to throw them more accurately.
 - Shotguns: Mad Maggie should be encouraged, but not required, to pick up a shotgun due to her
 Warlord's Ire ability that allows her to run shotgun-in-hand without being slowed down.
Also, it is highly suggested to respect dibs. Stealing a teammate's dibsed item may lead to reactions that vary from mild annoyance to straight up toxicity and intentional griefing, such as: alerting the whole lobby of your whereabouts, pushing a team alone, committing suicide (in-game of course), quitting the match, or all of them at the same time; some teammates ability can be used to purposely grief others, such as a Newcastle can drag a downed teammates right into line of fire or off the map (seriously, do not steal his knockdown shield). Don't steal your teammate's Level 2 ![]() Shotgun Bolt, you'll find another one for yourself, we promise.
Shotgun Bolt, you'll find another one for yourself, we promise.
Your first matches
Here's some general tips for your first matches, depending on the Round you're currently in. Generally, a game ends around Round 3, unless for some reason you, your teammates, or the enemies want to waste everyone's time by not attacking anyone until there are only 2 teams remaining, which may lead to games lasting up until the Final Round (6).
Early game (Rounds 1 and 2)
As is expected with most Battle Royale game modes, all Legends begin the match inside of a dropship flying across the map in a straight line. Checking your map for the projected flight path is a good idea, as this allows you to predict the amount of initial traffic each named location will have. Locations near the drop ship's flight path are usually densely populated at the start of the match because players can get into the action faster compared to late path locations.
The last player who picked their Legend will be chosen as the Jumpmaster, giving them the privilege to initiate the drop sequence for your team - although one can always decide to land alone, even if it's strongly discouraged. If you are the Jumpmaster, find out if your squad is looking for immediate action or a chance to get nicely geared, and then go ahead with the drop. Your two (or one) squad members will automatically follow your movement during the free-fall until they decide to break away and fly on their own. The ideal drop distance is approximately 500 meters. If your preferred drop location is further than 1000m, don't drop; rather, settle and find a closer location.
Sticking together in the same PoI largely increases your chance of survival once you land -- but try to avoid landing right next to the Jumpmaster, or else you'll all be scrambling for loot in the same location and all of you will probably end up with little to no loot. If you are the only team landing in the PoI, detach from the Jumpmaster when you are close to the ground PoI, land on different area of the PoI, and regroup with your squad after you've looted your own location. However, if there are other teams in the same area, stick to the same building can be wise, in case a team member is forced into the fight.
Once you've geared up adequately, collaborate with your squad when deciding where to go and what to do next. The Ring will periodically shrink and make the playable area smaller, and standing outside of it will keep dealing damage every second. While in the first round the damage can be ignored for the most part, subsequent rounds may not be so forgiving.
Mid game (Rounds 3 and 4)
You've looted your first location and may have headed towards another one. Maybe you've gotten into a fight with another squad along the way, maybe not. When the mid game approaches, it's best to assume that most players have at least a level 2 ![]() Evo Shield and thus, most of them will at least have 175 health each.
Evo Shield and thus, most of them will at least have 175 health each.
Since at this point the most important locations have usually been looted already, it's time to either seek a squad to fight for their loot and upgrade your ![]() Evo Shield, or to go inside The Ring and prepare for a later round. Engaging an enemy squad will however startle other nearby squads, due to the gunfire being loud which can be heard from afar, therefore make sure that you are either ready to fight more than just one squad, or ready to disengage them once another squad arrives. At this point in the game, Care Packages and Replicators will have came down, so if there are no squads around, try and get some better items from there.
Evo Shield, or to go inside The Ring and prepare for a later round. Engaging an enemy squad will however startle other nearby squads, due to the gunfire being loud which can be heard from afar, therefore make sure that you are either ready to fight more than just one squad, or ready to disengage them once another squad arrives. At this point in the game, Care Packages and Replicators will have came down, so if there are no squads around, try and get some better items from there.
Late game (Round 5)
Either by luck, skill, or simply because you have encountered nobody to fight, you're now in the late game. At this point, everyone should have at least a level 3 ![]() Evo Shield, or 200 total health. If you or your weapons are still equipped with level 1 items, you should try your luck with the available unlooted areas and Supply Bins you find while you're going inside The Ring. Who knows, maybe that one unopened Supply Bin at The Tree will contain an
Evo Shield, or 200 total health. If you or your weapons are still equipped with level 1 items, you should try your luck with the available unlooted areas and Supply Bins you find while you're going inside The Ring. Who knows, maybe that one unopened Supply Bin at The Tree will contain an ![]() Extended Light Mag for your R-301 Carbine.
Extended Light Mag for your R-301 Carbine.
Early positioning is key to winning a game: predicting where The Ring will end up is essential to get an advantage that might win you the game. If you can get to a building that is in The Ring before other teams do, then they will be forced to take the fight to you at a lower ground since it is a lot easier to hold a building than to push it, especially in late game. Play cautiously by keeping your attention focused far ahead of your immediate location. Climb walls whenever possible instead of taking the obvious path. Use Ziplines to quickly traverse open areas, but drop from them immediately if you see a squad at the end of the Zipline. If you enter a building, close the door on your way in as it may be the final giveaway that leads to your squad's demise.
End game (Final Round)
Since everyone is apparently scared to fight, the Ring has decided that you all have to die somehow, and therefore will shrink until there's no more safe ground that keeps you from burning to death. Squads are encouraged, if not forced, to move quickly due to The Ring now killing you in just 4 hits. Stakes are high, and squads are alert. Do whatever it takes to increase your chances of survival. Control some high ground or maybe decide to camp in an area. Abuse cover if being shot at. Nothing is off the table when the winner is decided in a matter of seconds.
Good luck!
Unlocking new Legends
A freshly created account on Apex Legends has access to 6 Legends: Bangalore, Bloodhound, Gibraltar, Lifeline, Pathfinder, and Wraith. Each other Legend the game offers can be purchased with ![]() 12,000 Legend Tokens, or
12,000 Legend Tokens, or ![]() 750 Apex Coins. Apex Coins can be purchased with real world currency, Legend Tokens can instead be earned by playing and leveling up. Since each time a new level is reached
750 Apex Coins. Apex Coins can be purchased with real world currency, Legend Tokens can instead be earned by playing and leveling up. Since each time a new level is reached ![]() 600 are awarded, a new Legend can be unlocked every 20 levels, although tokens are not earned up until Level 3, which means your first Legend unlock will most likely happen at Level 23.
600 are awarded, a new Legend can be unlocked every 20 levels, although tokens are not earned up until Level 3, which means your first Legend unlock will most likely happen at Level 23.
Below is some advice for picking the next Legend to unlock.
| Legend | Details |
|---|---|
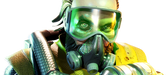 Caustic |
Caustic is easily the most straightforward of the trap-setting legends. Though he is very close-range by necessity, and his large hitbox can make him an easy target, his ability to coat entire buildings in gas is very strong. Not only is Nox Gas a very easy source of chip damage, it also slows enemies, making them easy to pick off. Although he usually will be playing in a very defensive way, his |
 Mirage |
As a legend whose playstyle is all about trickery, Mirage is strongest when his enemies are gullible. That said, a good Mirage player can fool anyone by using their decoys right. There are lots of uses for decoys; luring enemies into danger, distracting enemies while you escape, distracting enemies while you shoot them from a different angle, or simply making enemies waste ammo on nothing. In addition, Mirage's ability to cloak while reviving with |
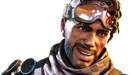
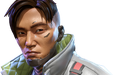
 Octane |
Octane has one of the simplest but most powerful advantages that any character in any game can possess: speed. While other legends can increase their move speed under certain circumstances, Octane has constant access to a 30% speed boost, making him very strong for flanking, repositioning, and head-to-head combat. He does sacrifice health to do so, but his passive |
 Wattson |
Wattson can be difficult to pick up for new players; her defenses take a lot of time and map knowledge to set up, and even when they're set up it can be hard to tell how effective they are. However, a well-built web of |
 Crypto |
Crypto has the best tools for finding enemies over large swaths of land. Being able to scout entire POIs with the |
 Revenant |
Revenant is a simple but effective generalist, great for any kind of offensive push. His |
 Loba |
Loba's primary draw is her ability to get herself and her squad the best loot available. In the early game, she can find the exact weapons she wants; in the midgame, she can quickly check entire POIs for high-tier attachments and gear; and in the late game, she can keep herself and her squadmates topped up on ammo and grenades. The |
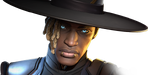
 Rampart |
Being able to build cover that allows you to shoot your enemy while they can't shoot you is powerful enough on its own; the fact that it boosts outgoing damage is the icing on the cake. Rampart setups can be vulnerable to flankers or grenades, but survive those and you've got the best tools for exerting pressure on an enemy from a distance. Especially when coupled with a well-placed Sheila, you can mow down enemies in seconds. And of course, if you're an LMG enthusiast, Rampart makes them even better thanks to |
 Horizon |
Horizon is a mobility legend for team players. Though |
 Fuse |
For those that enjoy the simple pleasure of throwing explosives, Fuse is the perfect legend. |
 Valkyrie |
Valkyrie's ability to fly is straightforward, but its flexibility makes it very strong in the right hands. Flying high into the sky can be great for scouting, but leaves you very vulnerable in the air; more often you'll be flying in short bursts to get over gaps, scale buildings, dodge fire, or find a good angle to launch a |
 Seer |
Seer almost entirely nullifies the element of surprise. His most powerful tool is |
 Ash |
The ultimate engagement (or third-partying) legend. Ash allows your team to quickly travel to a distant spot, or to claim high-ground with |
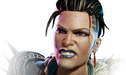 Mad Maggie |
Mad Maggie is a strong offensive Legend with great breaching capabilities. Her |
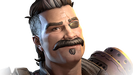
 Newcastle |
Newcastle is an amazing defensive Legend, focused on protecting his Squad with all of his abilities. His |
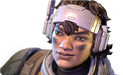 Vantage |
Are you really good at sniping? Want to have a character who's based around it? Vantage is for you! With her |
 Catalyst |
Compared to the other Controller legends, Catalyst is much more able to put together defenses on the fly. Combat around doors is a frequent occurrence in Apex, and with her ability to reinforce them, she can turn any doorway into an advantageous position. |
 Ballistic |
Ballistic doesn't have a lot of unique tools; he's more about improving and enabling the tools you already have: your weapons. With the ability to keep a third weapon in your |
 Conduit |
Conduit is the platonic ideal of a support character, with the ability to just point at a squadmate and give them more health. It's not instant, and it's not permanent, but it's often more than enough to help a squadmate in a tough spot survive, and it requires nothing more than the push of a button. (It's especially useful if your squadmates love wandering off and running blindly into dangerous situations.) Her ultimate, |
Tips and Tricks
- Don't forget to make use of your abilities whenever possible. It can be easy to get caught up in pure gunfights while neglecting the abilities that could give you a crucial advantage.
- For new players, if you want to survive, drop away from the path of the dropship.
- The hot zone and the supply ships do have more loot, but that also means more players will go there.
- Always pick up a
 Shield Core from a fresh death box, especially during a fight. It will always be fully recharged once equipped. Pick it up to avoid having to recharge your shields and avoid getting ambushed.
 - Wear a Headset or Earbuds if you can. This will allow you to hear enemy footsteps better, which may result in an advantage over your opponents.
- Be careful when using airstrikes. They are very loud and visible from far away, and more enemies might come to join the action!
- Try to find a Legend you enjoy and are comfortable with using (often referred to as a main). Being experienced with one or two Legends will give you an advantage over players who don't main that Legend, and make you more likely to win. It can also help if someone takes your main you can instead use your 2nd ( or 3rd if someone else takes your 2nd main ) main
- If you are having trouble aiming, spend a few hours in the Firing Range to learn the recoil of all weapons. A few hours doing that will significantly help your aim in the months ahead.
- Don't neglect grenades! They can be very useful in a variety of scenarios, such as fishing enemies out from cover.
- When opening a Care Package, remember that there is a beacon above the care package that is removed when it is opened. If you see the light go away, you'll know that enemies are there. Likewise, know that if you open a care package, know that enemies will most likely come to that location.
- Try combining different Legends' abilities. For example, use Ash's
 Arc Snare to keep a target in place while you damage them with Fuse's
  Knuckle Cluster.
 - Loot quickly after finishing a fight, especially in an open area, as you are vulnerable to attack from a third party.
- Land in less crowded areas if you want a better chance at surviving to the endgame.
- Although Shield Cells and Syringes heal for small amounts, that small bit of healing might be the only bit you can get off mid-fight.
- If one wants to do a finisher be sure that you're safe and indoors as enemies can still damage you or even knock you.
- Try to use abilities to counter other abilities. For example using Crypto's Drone EMP will counter Gibraltar's Dome of protection.
- Some weapons go along with some Legends. For example one can use any Shotgun with Mad Maggie and any Sniper with Vantage.