- Places a hovering healing drone that heals all players within 6 meters.
- Heals 8 health per second with an infinite healing pool, and lasts 20 seconds.
- The drone cannot be moved around once placed.
Lifeline
(Redirected from Combat Medic)
Jump to navigation
Jump to search
| Apex Legends content
This article concerns the subject and the content related to it in Apex Legends. For the subject in Apex Legends Mobile, see Lifeline (Mobile). For the background of the subject in Apex Legends universe, see Lifeline (character). |
| Lifeline |
|---|

|
| Combat Medic | |
| Details | |
| Real Name | Ajay Che |
|---|---|
| Gender | Female |
| Age | 26 |
| Homeworld | Psamathe |
| Gameplay | |
| Class | |
| Tactical Ability | |
| Passive Ability | |
| Ultimate Ability | |
| Real-world Info | |
| Voice Actor | Mela Lee [1] |
| Added | Feb 04, 2019 |
| “ | Nuh romp wid mi. I'm ready for a match. |
Lifeline is a ![]() Support Legend who has been available since launch. She can use her
Support Legend who has been available since launch. She can use her ![]() Combat Revive to save downed allies automatically, leaving her free to act. Her
Combat Revive to save downed allies automatically, leaving her free to act. Her ![]() D.O.C. Heal Drone can be deployed to restore health without using items, and her
D.O.C. Heal Drone can be deployed to restore health without using items, and her ![]() Care Package can call in a new shipment of useful items when her squad runs low.
Care Package can call in a new shipment of useful items when her squad runs low.
Lifeline is unlocked by default on all players' accounts.
Abilities
D.O.C. Heal Drone

|
Tactical | Q/ |
|---|---|---|
| D.O.C. Heal Drone | ||
| Description | The Drone Of Compassion (DOC) automatically heals those near it over time. | |
| Cooldown | 45 seconds | |
- Can be destroyed by The Ring after 2 damage ticks.
- If placing the heatshield first before deploying D.O.C. Heal Drone, it will not be destroyed. However, playing drone first in ring, then cover it with heat shield, will still destroy it.
- Caustic's gas will make the D.O.C. Heal Drone malfunction while inside of the gas and will not be able to heal anyone.
- Crypto's
 Drone EMP can destroy the D.O.C. Heal Drone.
 - Gibraltar's
 Dome of Protection and Caustic's
  Nox gas Traps can be placed on the D.O.C Heal Drone, but they disappear as the drone does.
 - The drone will not heal players while using Revenant's
 Death Totem.
 - Can be attached to the Trident to heal while repositioning.
- The drone should generally be used liberally to help recently revived allies recover their health faster, or to conserve their
 Med Kits.
 - Drop the drone while performing other actions where the player is not moving much to accomplish two things at once. For example, use it...
- ...while fighting and behind cover.
- ...before/while replenishing shields to recover both shields and health at the same time.
- ...on top of enemy body-boxes after finishing a fight so that the player and their allies can heal while looting.
- ...on top of a respawn beacon or a downed ally so the player can heal while channeling to revive them.
- The player can also use one
 Syringe to speed up the healing process, but not too many, as this will waste the ability itself.
 - If an injured ally is far away but running to Lifeline, it is possible to drop the drone early so that Lifeline can advance in position while the ally runs to the drone for health.
- Avoid using the drone mid-air; it might never reach the ground, and if it does not reach the ground, then it will never start healing anyone.
- The player cannot push the drone around so make sure it is placed properly and/or behind cover.
- Sometimes the D.O.C. Heal Drone has environmental interaction issues, which can cause the Heal Drone to go through a Door, Wall, Crate, etc.
- The D.O.C. Heal Drone will sometimes randomly float upwards.
Combat Revive

|
Passive | |
|---|---|---|
| Combat Revive | ||
| Description | Deploy D.O.C to revive teammates, leaving Lifeline free to defend. | |
- Pressing "Interact" (E/
 /
/ /
/ ) once near a downed teammate will deploy D.O.C. to start the auto-revive process.
- The player can leave D.O.C. to continue the revive, giving the player the capability to revive another teammate, or defend the teammate being revived.
- Player does not have to hold down the "Use" to complete the revive.
- Teammate can press "Character Utility Action" (H/
 /
/ /
/ ) to cancel their revive.
- Can revive two players at the same time.
- Players being revived by Lifeline can cancel their revive.
- The extra compartment in blue supply bins can be opened by pressing the "interaction" button, revealing two more supplies (excludes
 Knockdown Shields).
 - If a player is in the process of being revived by D.O.C., the revive will not be canceled when the last player in the squad is downed and therefore the squad will not be eliminated until the revived player is killed.
- The blue supply bins in Arenas always contain 8
 Shield Cells in the extra compartment.
- Since Lifeline can auto-revive, it can be beneficial to revive allies in the middle of a fight.
- however, without cover, and especially without a Gold Knockdown Shield, there is a high probability that they get downed again immediately afterward or killed during the revive.
- Engaging the enemy or after letting D.O.C. continue the revive or canceling the revive could increase the teammate's survivability.
- however, without cover, and especially without a
- There is a brief loss of momentum when starting the auto-revive.
- Sliding into the auto-revive removes the brief loss of momentum.
- To get the most of this ability, try to revive teammates behind/near cover or in conjunction with Gibraltar's Dome of Protection.
- Use the
 D.O.C. Heal Drone to heal recently-revived allies, and/or to heal oneself during revives.
 - Teammates should press the "Character Utility Action" when one sense a firefight nearby.
Care Package

|
Ultimate | Z/ |
|---|---|---|
| Care Package | ||
| Description | Call in a droppod full of high quality defensive gear. | |
| Charge time | 3.5 minutes | |
- Care Packages come with 3 item slots, and always guarantee an upgrade to the player's squad’s current loadout, if possible. Each slot contains one of the following:
- Slot 1 (right slot relative to where the care package was called):
 Evo Shield,
  Helmet or Knockdown Shield The body shield will always be an upgrade, depending on what the team is wearing (Example, the team has all level 3 \ Evo Shields, there will be a guaranteed level 4
  Body Shield).
 - Slot 2 (left slot): Shield Cells,
 Shield Batteries, Syringes, Med Kits,
  Mobile Respawn Beacons,
  Heat Shields, and
  Phoenix Kits.
 - Slot 3 (front slot): Weapon Attachments.
- Slot 1 (right slot relative to where the care package was called):
- Unlike natural airdrops, Lifeline's care packages are blue and are not marked on the map or announced. They emit a blue light when unopened.
- Takes 8 seconds to land once called in.
- If Lifeline and her squad die before the Care Package is opened, it will contain three Mobile Respawn Beacons.
- Instead of its usual contents, it contains 2 Shield Batteries and 1 Rare fully kitted weapon in arenas.
- While not as flashy as some other legend's ultimates, the high chance of getting Epic-tier Evo Shields is worth its weight in gold especially if the player's squad has not had the good fortune to get anything above Common, as well as supplying Shield Cells and Med Kits if they have been depleted after a particularly grueling fight.
- Can be used as a cover in an area with low covers, or as a stepping stone to climb up to greater heights.
- Lifeline's team should prioritize pinging out and giving her most if not all of the
 Ultimate Accelerants they find, at least in the early-mid game.
 - Lifeline can use her Care Package on Round 6 to take up nearly all the space in the final area, provide cover, and can be used to climb up to safety as the chaos unfolds.
- Care Package should generally be used as soon as it comes off cooldown unless the team is worried about enemies being very close by or if the player's team is running from something dangerous.
- Lifeline care packages are very obvious and can thus compromise the team's exact position. Be on guard when using it, as nearby enemies may decide to come running over.
- This issue is exacerbated in the very late game with 2-3 squads remaining, where a small circle makes getting ambushed that much more likely.
- Conversely, this can be used to Lifeline's advantage, as bait: Lifeline could use the package away from her team to mislead enemies, or in a spot where her team can watch the care package and ambush whoever comes.
- If enemies are standing underneath the package as it drops, they will be crushed.
- As an enemy squad, watch out for the various visual and audio effects. Calling in a Lifeline Care Package makes the same sound as when a regular care package is called in, but it is not announced. This sound especially is audible over a long distance.
- Though the sound effects are different, be sure not to confuse the blue beacon of light with the light blue one of a
 Replicator.
- The player can also use it after you have respawned a teammate to replenish a bit of their loot, but like the aforementioned tip, be on guard when using it as enemies have an extremely high chance of coming to you because of the Respawn Ship and the Care Package.
Perks
| Perk | Effects |
|---|---|
 Support |
|
Upgrades
Level 2 Upgrades - Unlocked at 450 EVO
- Rapid Response: Revive squadmates 20% faster. (5 sec → 4 sec)
- Tactical Cooldown++: Reduce D.O.C. Heal Drone cooldown by 25 seconds. (45 sec → 20 sec)
Level 3 Upgrades - Unlocked at 1800 EVO
- Last Stand: Gain a self-revive. Takes 6 seconds to use.
- Gold-Plated: The next Care Package will contain a Level 4
 Backpack, Knockdown Shield, and a
  Full Evo Cache. Also contains a Shield Battery, a Med Kit, and a Phoenix Kit or a Mobile Respawn Beacon.
Lore
| “ | Ajay Che, aka Lifeline, isn’t someone you would expect to find in the Apex Games. The child of wealthy war profiteers, she left home when she learned of the damage her family had caused and enlisted in the Frontier Corps, a humanitarian organization that aids Frontier communities in need. She’s since devoted her life to helping others and joined the Apex Games to fund the Frontier Corps with her winnings.
Since no one in the Games is innocent — they all know what they signed up for — and every one of her victories means help for those in need, Lifeline has no problem engaging in the popular bloodsport. Or so she tells herself. She may seem sarcastic and callous, but deep down she wants to help people and make the world a better place. If that means taking a few people down in the process, so be it.[2] |
For more information on Lifeline's story, see Lifeline (character).
Cosmetic items
Skins
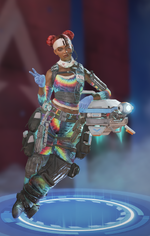
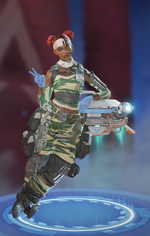
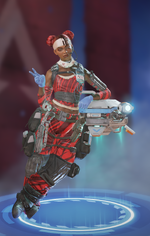
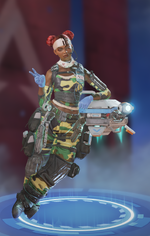
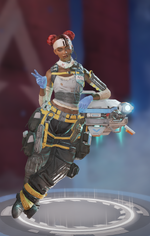
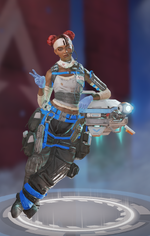
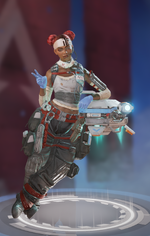
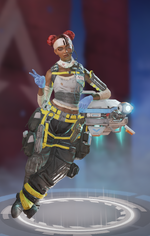
There are a total of 89 Legend skins for Lifeline; 1 Iconic, 31 Legendary, 16 Epic, 25 Rare and 16 Common.
 Runaway Hit

Peak Performer
 1,200
1,200
![Vital Signs[Story 1] 1,200](/images/thumb/1/17/Vital_Signs_Lifeline.png/150px-Vital_Signs_Lifeline.png)
Vital Signs[Story 1]
1,200
![London Calling[Story 2] 1,200](/images/thumb/0/0c/London_Calling_Lifeline.png/150px-London_Calling_Lifeline.png)
London Calling[Story 2]
1,200
Organized Anarchy
1,200
 My Wave 1,200
 Lifeline Bling
Needs Peak Performer First Responder
Needs Organized Anarchy
 Judge Jury Executioner
 From the Ashes
Level 53
 Guardian Angel
 Balance Shift
Needs Vital Signs Rejuvination
Needs London Calling
 Pirate Queen
 Breach and Clear
 Worlds Apart
 Bad to the Bone
Level 50
 Ghost Stalker
 Hell Raiser
 Alabaster Titan
 Mic Check
 Combat Survivalist
 Healing Huntress
 Angel of Death
 Freestyle
 Shinobi Surgeon
 Haunt+Heal
 Cruel Medicine
 Code Blue
Level 50- Highlighted Healer Lifeline.png Highlighted Healer[note 1]

![Vital Signs[Story 1] 1,200](/wiki/File:Vital_Signs_Lifeline.png)
![London Calling[Story 2] 1,200](/wiki/File:London_Calling_Lifeline.png)


![Mischief Medic[Story 3][note 1]](/wiki/File:Mischief_Medic_Lifeline.png)
![Hyped Healer[Story 4] [note 2]](/wiki/File:Hyped_Healer_Lifeline.png)


Note:
Story of Lifeline:
- ↑ Vital Signs: Ajay Che was always the first with her hand up to volunteer for the most extreme expeditions in her time with the Frontier Corps - so much that they were informally dubbed "Chexpeditions."
- ↑ London Calling: On a trip to Solace, Lifeline befriended and joined a touring punk band called The Flyer Liars. It was a small step out of her parents’ wealthy world - one that eventually gave her the strength to leave home for good.
- ↑ Mischief Medic: Joining the Frontier Corps was Lifeline's way of making up for her family's mistakes, but even with the best intentions, she couldn't escape her family's reputation.
- ↑ Hyped Healer: On a trip to Solace, Lifeline befriended and joined a touring punk band called The Flyer Liars. It was a small step out of her parents' wealthy world - one that eventually gave her the strength to leave home for good.
Blockchain Reaction
400
Daemon Hunter
400
Fiber Optics
400
Heat Sync
400
Neural Net
400
 Desert Doctor 400
 Pain Killer

 Green Widow
 Snow Crystal
 Hot Blooded
 Jammer
 Cold Compress
 Hardcore Heals
Level 1
 Alchemist
 Sundown Surgeon
Level 1
 Electric de Chocobo


Blacklight Classic
60
Brain Candy
60

Checkered Past
60
Coastal Waters
60
Desert Scorpion
60
Dot Product
60
Electric Synapse
60
Mint Condition
60
Purgatory
60
Self Organized
60
Sizzle Reel
60
Tie Dye
60
Tropic Streak
60
Warlord
60
Woodland Warfare
60

 Revolutionary
Level 01
 Neon Dream
Season 1
 Blossom
 500
500
 Health Drain
Level 01 Tide Pool
Season 6
 Pastel Dreams
October 2020
 Data Driven
Level 74![Bow Blossom[note 1]](/images/thumb/a/a4/Bow_Blossom_Lifeline.png/150px-Bow_Blossom_Lifeline.png)
Bow Blossom[note 1]
 Ocean Groove
Season 17
 Jewel Tones
Level 57


![Bow Blossom[note 1]](/wiki/File:Bow_Blossom_Lifeline.png)


Note:
- ↑ Store exclusive.
Original
Default
Amethyst
30
Arctic
30
Cardinal
30
Clearwater
30
Evergreen
30
Flamingo
30
Hydro
30
Limelight
30
Mandarin
30
Orchid
30
Rage
30
Sahara
30
Skyward
30
Vino
30
Yellowjacket
30


Finishers
Main article: Finisher
Peace Out
DefaultAjay's Lullaby
1,200
D.O.C.'s Shock
1,200
Heirloom Set
Main article: Heirloom

The set contains:
- A Melee Weapon Skin: Shock Sticks
- A Banner Pose: Shock Sticks
- An Intro Quip: "Check yo self - or wreck yo self. (laugh)"
Emotes
Main article: Emote
- It's Funky Enough - 1,200
- Shout Outs - 1,200
- Hip Hip Hooray [note 1]
- Bust A Move - 400
- Little Trickster
 Footwork - Level 12
 Last Laugh
- Jammin' - Default
Note:
- ↑ Store exclusive, included in the Hyped Healer Bundle
Skydive Emotes
Main article: Skydive Emote
 Peace Out
Level 45- Windmill
Level 85  Vibing
Level 37- Bringin' The Beat Down
Level 51 - Winging It
Banner Frames
Clear!
1,200
Feel the Beat
1,200
Good Medicine
1,200
Search and Rescue
1,200

Shooting Star
1,200


 Tailed Reflections 400
 Winged Guardian
 Tools of the Trade
Level 72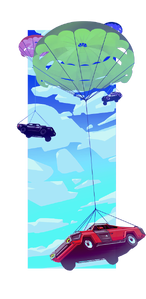
 Car Package
Level 68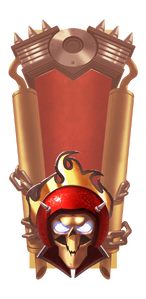 Leader of the Pack
Level 71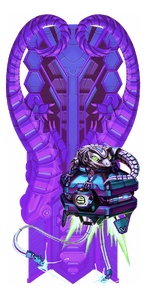 Heat Treatment
Level 72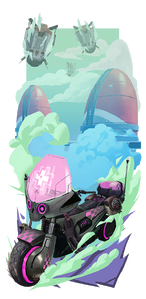 Rebel With A Cause
Level 42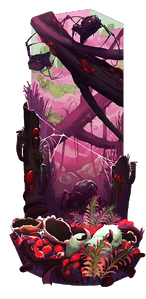 Preyed Upon
 Fear and Loathing
Level 79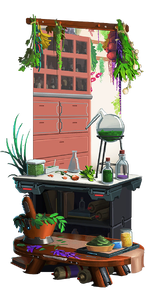 Herbal Medicine
 Robot Resupply
Level 74 Rejuvenation
- Lifeline Banner Neon Takeover.png Neon Takeover


Called Shots
60

In Stitches
60
Patched Up
60

Surgical
60
Temperature Rising
60
 Detention Center 60
 Pick Me Up
Level 61 Perfect Execution
Level 18 Square Dance
July 2019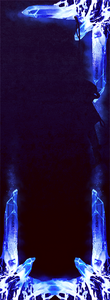 Crystalized Ice
Level 35 Deadly Fortune
August 2020 Midnight Ride
Season 17


Rookie Card
Default
Love
30

Pink
30

Star
30

Stripe 3
30


Banner Poses
Shock Sticks

Bad D.O.C.
400
Drumroll Please
400
Funslinger
400
Good Vibes
400
 Head on a Swivel 400
Joy Ride
400
 Preventative Measures
- Lifeline Pose Wardrobe Change.png Wardrobe Change


BFF
60
Connected
60
Daydreamer
60
Encore
60
Let's Go!
60
Lounging
60
Relaxed
60
Talking Game
60


Peace
Default

Holosprays
Main article: Holospray
Try And Stop Me!
1,200
Bleed, Patch and Keep Movin'
400
Get A Life
400
Got A Job To Do
400
Patch 'Em Up
400
The Doc Is In
400
The Last Laugh
400
 DOC on Lock 400

 I Got Ya Beat
Level 34 Let's Rumble
Level 04 Smoking Kills
Level 48 Cold Blooded
Level 73 Double Trouble
Level 43
 I'm Yuh Lifeline
 Don't Mind If I Do
 Doc's Orders
Level 75


Voice lines
See: Lifeline/Voice lines
History
| Patch notes |
|
Gallery
- Videos
- Images
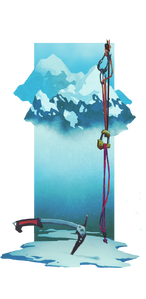
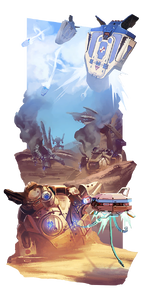
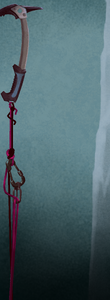
![Lifeline climbing an icy mountain.[3]](/images/thumb/7/79/Lifeline_wallpaper_2.jpg/150px-Lifeline_wallpaper_2.jpg)
Lifeline climbing an icy mountain.[3]
![A letter from a fan.[4]](/images/thumb/1/1c/Lifeline_Letter_From_A_Fan.png/128px-Lifeline_Letter_From_A_Fan.png)
A letter from a fan.[4]
![Early concept art of Lifeline.[5]](/images/thumb/f/f7/Hethesrodawa_Lifeline_Early_Concept.jpg/111px-Hethesrodawa_Lifeline_Early_Concept.jpg)
Early concept art of Lifeline.[5]
![Concept art of Lifeline.[6]](/images/thumb/d/d5/Hethesrodawa_Lifeline_Concept.jpg/96px-Hethesrodawa_Lifeline_Concept.jpg)
Concept art of Lifeline.[6]
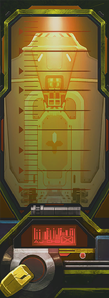
![Concept art of the D.O.C. Heal Drone.[7]](/images/thumb/5/59/Dannygardner_lifeline_drone.jpg/150px-Dannygardner_lifeline_drone.jpg)
Concept art of the D.O.C. Heal Drone.[7]
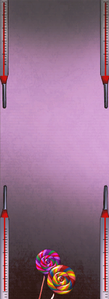
![Concept art of Lifeline's Pirate Queen skin.[8]](/images/thumb/9/96/Pirate_Queen_Lifeline_Concept_Art.jpg/150px-Pirate_Queen_Lifeline_Concept_Art.jpg)
Concept art of Lifeline's Pirate Queen skin.[8]
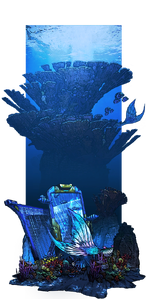
![Concept art of Lifeline's London Calling skin.[9]](/images/thumb/b/b5/London_Calling_Lifeline_Concept_Art.jpg/150px-London_Calling_Lifeline_Concept_Art.jpg)
Concept art of Lifeline's London Calling skin.[9]
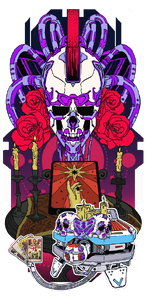
![Concept art of Lifeline's Judge Jury Executioner skin.[10]](/images/thumb/6/67/Judge_Jury_Executioner_Lifeline_Concept_Art.jpg/150px-Judge_Jury_Executioner_Lifeline_Concept_Art.jpg)
Concept art of Lifeline's Judge Jury Executioner skin.[10]
![Concept art for Lifeline's My Wave skin.[11]](/images/thumb/f/f7/My_Wave_Lifeline_Concept_Art.jpg/150px-My_Wave_Lifeline_Concept_Art.jpg)
Concept art for Lifeline's My Wave skin.[11]
![Concept art for Lifeline's Breach and Clear skin.[12]](/images/thumb/7/78/Breach_and_Clear_Lifeline_Concept_Art.jpg/150px-Breach_and_Clear_Lifeline_Concept_Art.jpg)
Concept art for Lifeline's Breach and Clear skin.[12]
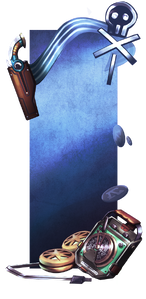
![Concept art for Lifeline's Mischief Medic skin.[13]](/images/thumb/c/cf/Mischief_Medic_Lifeline_Concept_Art.jpg/150px-Mischief_Medic_Lifeline_Concept_Art.jpg)
Concept art for Lifeline's Mischief Medic skin.[13]
![Concept art for Lifeline's Healing Huntress skin by Gadget-Bot Productions.[14]](/images/thumb/f/f9/Healing_Huntress_Lifeline_Concept_Art.jpg/150px-Healing_Huntress_Lifeline_Concept_Art.jpg)
Concept art for Lifeline's Healing Huntress skin by Gadget-Bot Productions.[14]
![Lifeline climbing an icy mountain.[3]](/wiki/File:Lifeline_wallpaper_2.jpg)
![A letter from a fan.[4]](/wiki/File:Lifeline_Letter_From_A_Fan.png)
![Early concept art of Lifeline.[5]](/wiki/File:Hethesrodawa_Lifeline_Early_Concept.jpg)
![Concept art of Lifeline.[6]](/wiki/File:Hethesrodawa_Lifeline_Concept.jpg)
![Concept art of the D.O.C. Heal Drone.[7]](/wiki/File:Dannygardner_lifeline_drone.jpg)
![Concept art of Lifeline's Pirate Queen skin.[8]](/wiki/File:Pirate_Queen_Lifeline_Concept_Art.jpg)
![Concept art of Lifeline's London Calling skin.[9]](/wiki/File:London_Calling_Lifeline_Concept_Art.jpg)
![Concept art of Lifeline's Judge Jury Executioner skin.[10]](/wiki/File:Judge_Jury_Executioner_Lifeline_Concept_Art.jpg)
![Concept art for Lifeline's My Wave skin.[11]](/wiki/File:My_Wave_Lifeline_Concept_Art.jpg)
![Concept art for Lifeline's Breach and Clear skin.[12]](/wiki/File:Breach_and_Clear_Lifeline_Concept_Art.jpg)
![Concept art for Lifeline's Mischief Medic skin.[13]](/wiki/File:Mischief_Medic_Lifeline_Concept_Art.jpg)
![Concept art for Lifeline's Healing Huntress skin by Gadget-Bot Productions.[14]](/wiki/File:Healing_Huntress_Lifeline_Concept_Art.jpg)

- Merchandise

A Funko Pop of Lifeline released in November 2019.
An exclusive version of Lifeline's Funko Pop, featuring her Tie Dye skin.
A Figures of Fandom statue released by Weta Workshop.
Lifeline Nendoroid.


See Also
References
- ↑ Mela Lee on Twitter
- ↑ Apex Legends - Lifeline - Official Profile
- ↑ Tu Bui on Artstation
- ↑ A Letter from a Fan - Lifeline
- ↑ Hethe Srodawa on Twitter
- ↑ Hethe Srodawa on Artstation
- ↑ Danny Gardner on Artstation
- ↑ [1]
- ↑ [2]
- ↑ [3]
- ↑ https://www.artstation.com/artwork/6bv49O
- ↑ https://www.artstation.com/artwork/Wm2BwX
- ↑ https://www.artstation.com/artwork/xY6244
- ↑ https://www.artstation.com/artwork/Je68mD
| ||||||||||||||||||||